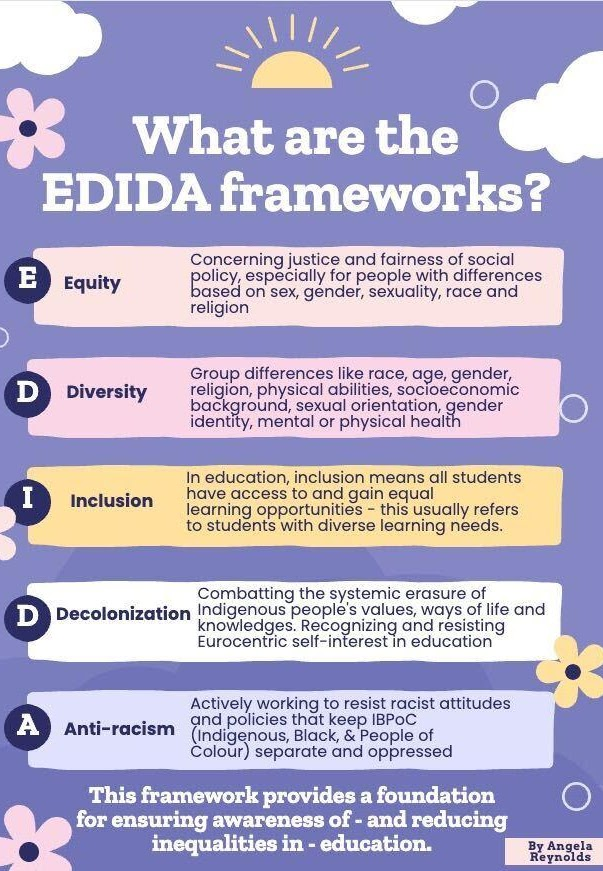
For my EDIDA project, I first listened to the information taught in our ASDT class and learned about what the equity, diversity, inclusion, decolonization and anti-racism framework was about. I pondered what kind of artifact I could create that students could all contribute to and feel a combined ownership over, and would also reinforce an inclusive atmosphere in our classroom?
The following is a step by step process of how I achieved my goal.
Step 1: Inspiration and Ideation
We had recently done a project in our Indigenous class about finding our family history roots up to four generations back. This had me thinking about family trees and how they unite people, and give a sense of feeling included despite the fact that every person on that tree is unique and valued for their differences. This inspired me to create a classroom family tree where each student could hang a small circle with a picture of what is unique about them, or of something they love. I thought it would be creative to make this tree out of wood and have it be 3-D so that it could sit on display in our classroom.
Step 2: General Design and Plans
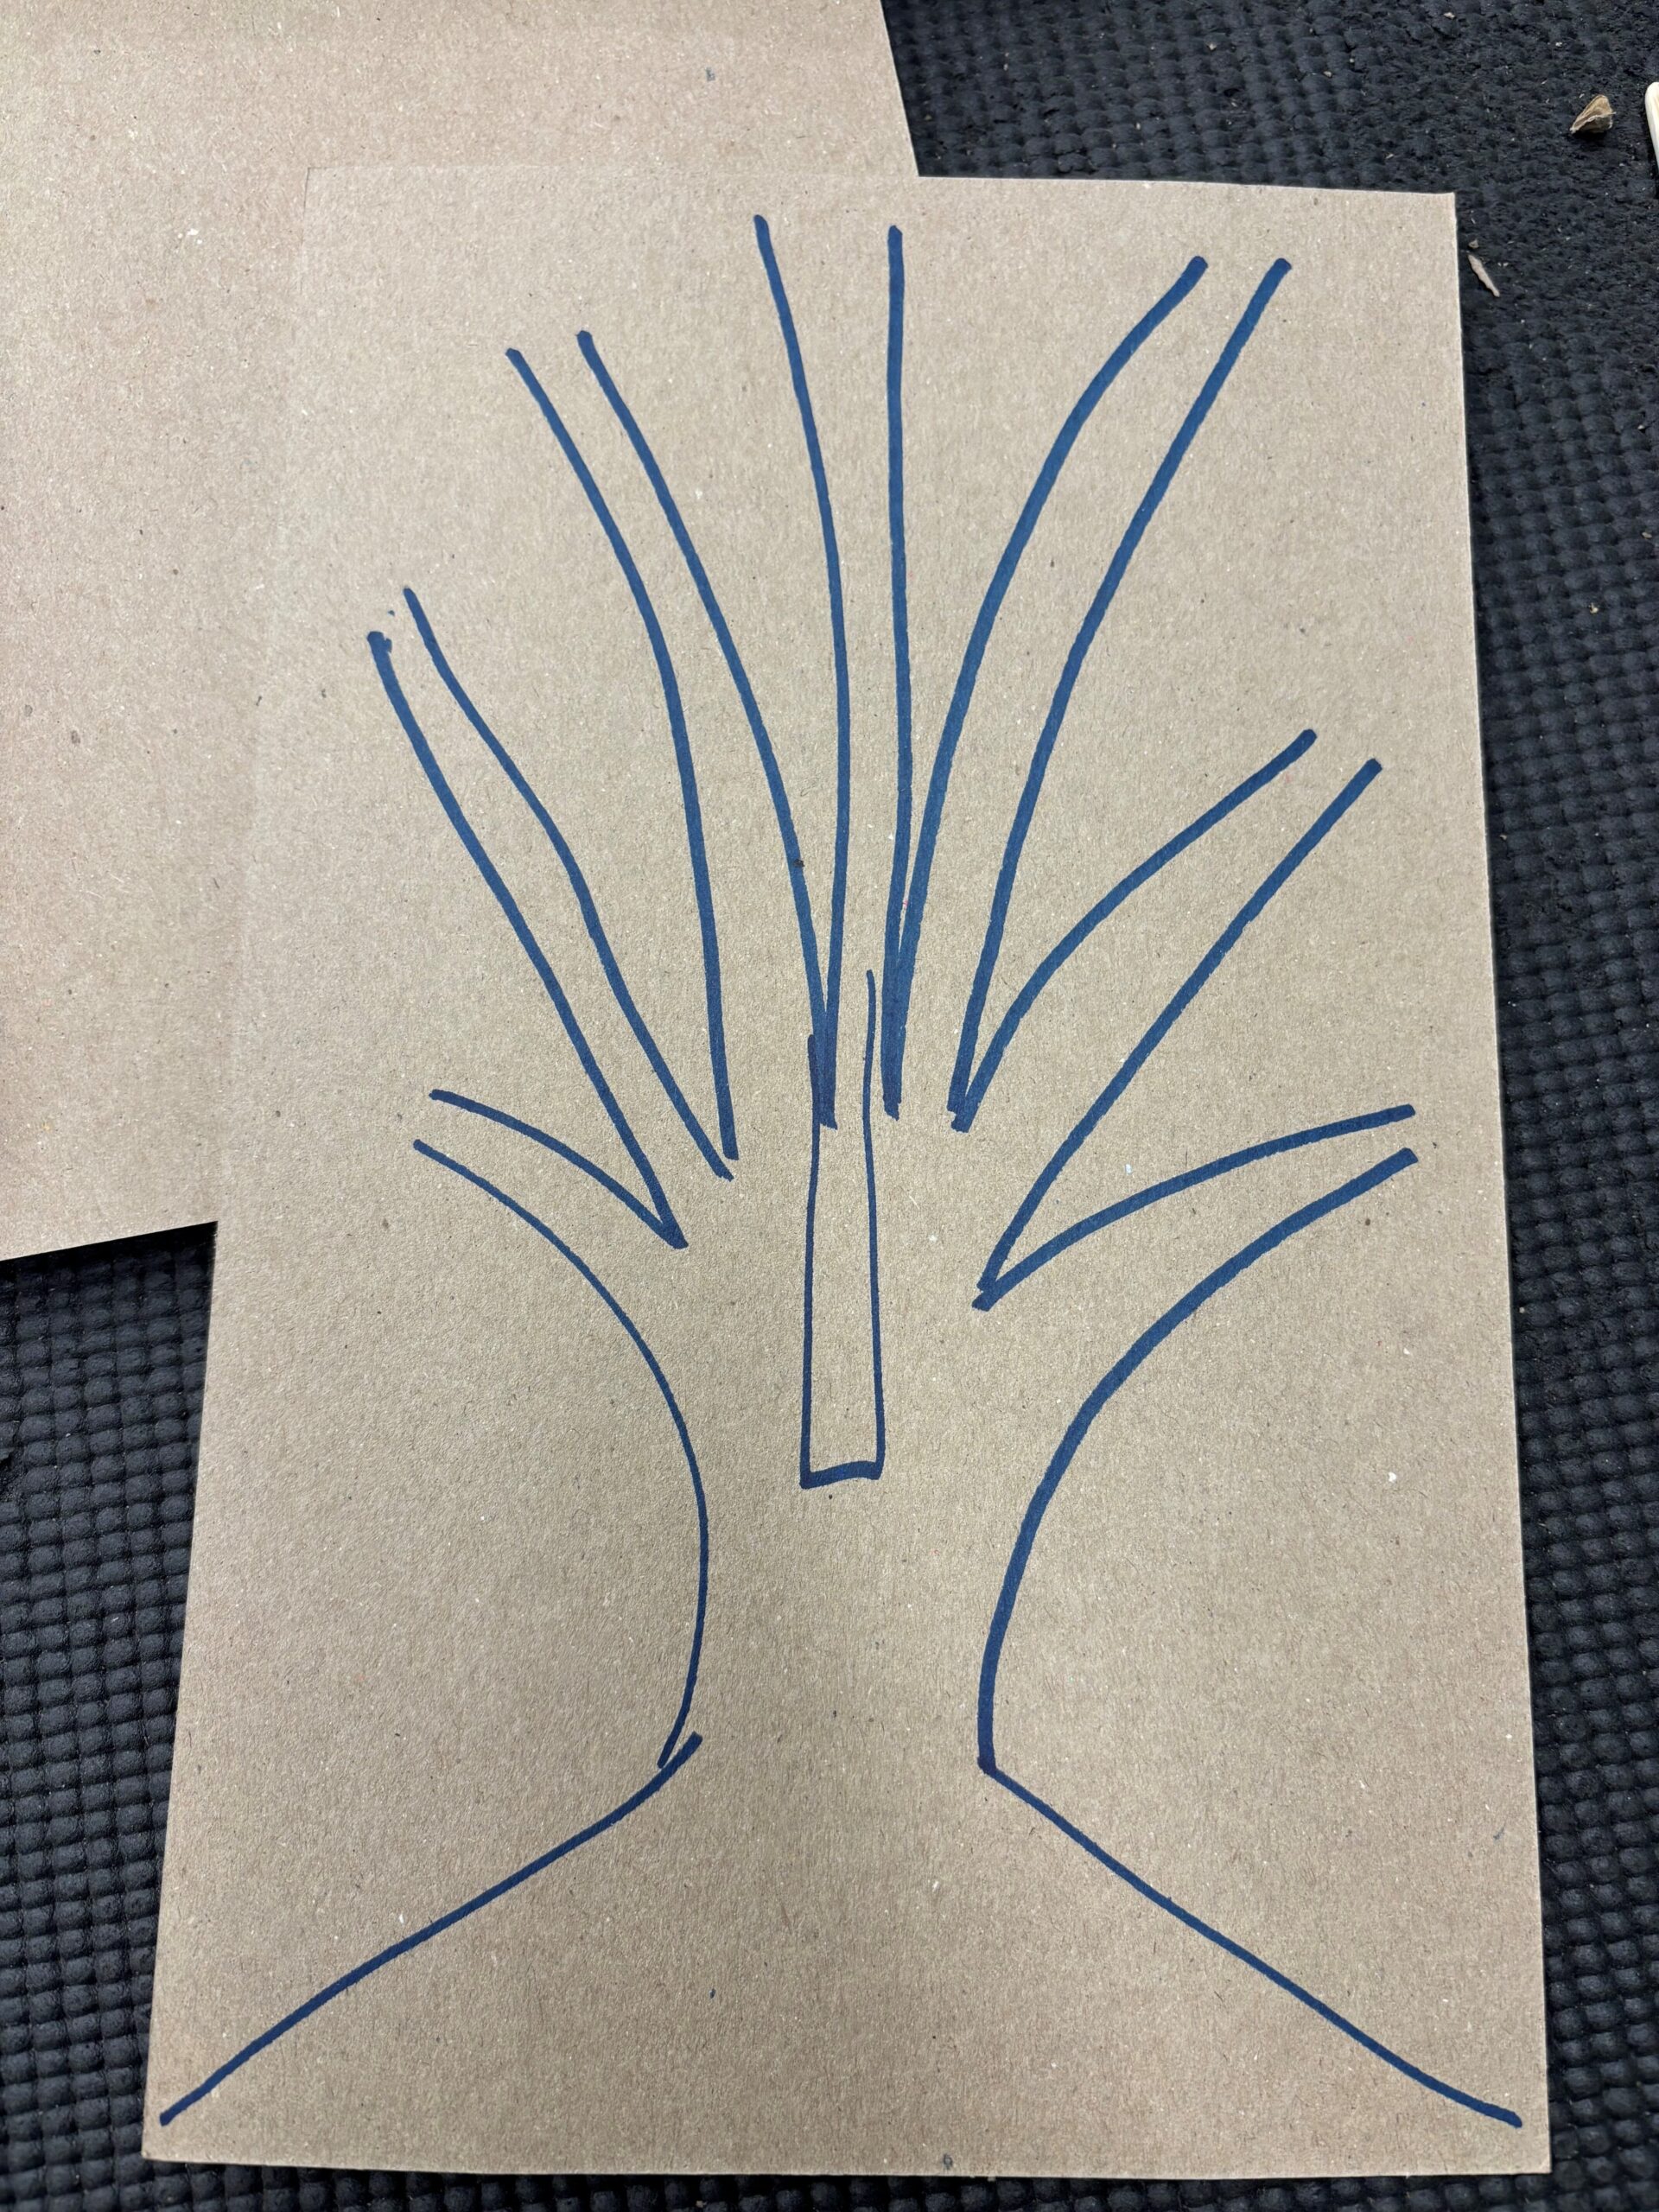
I started to draw a general idea of what I wanted the tree to look like. I also knew that in order to make it stand up, two trees would need to slide into each other in an interlocking fashion. One slot on top, the other on the bottom.
Step 3: Prototype
I used the chomp saw to cut out the prototype on cardboard. I must admit, it was a bit of a brain teaser to figure out where to put the cuts for the interlocking section. I was putting the constructionist theory into action as I actively participated in the making of a physical object. As Cohen et al share, the two pillars of constructionism is “making and sharing”; the act of physically creating an artifact, “as opposed to simply constructing a mental representation” (Cohen et al, 130).
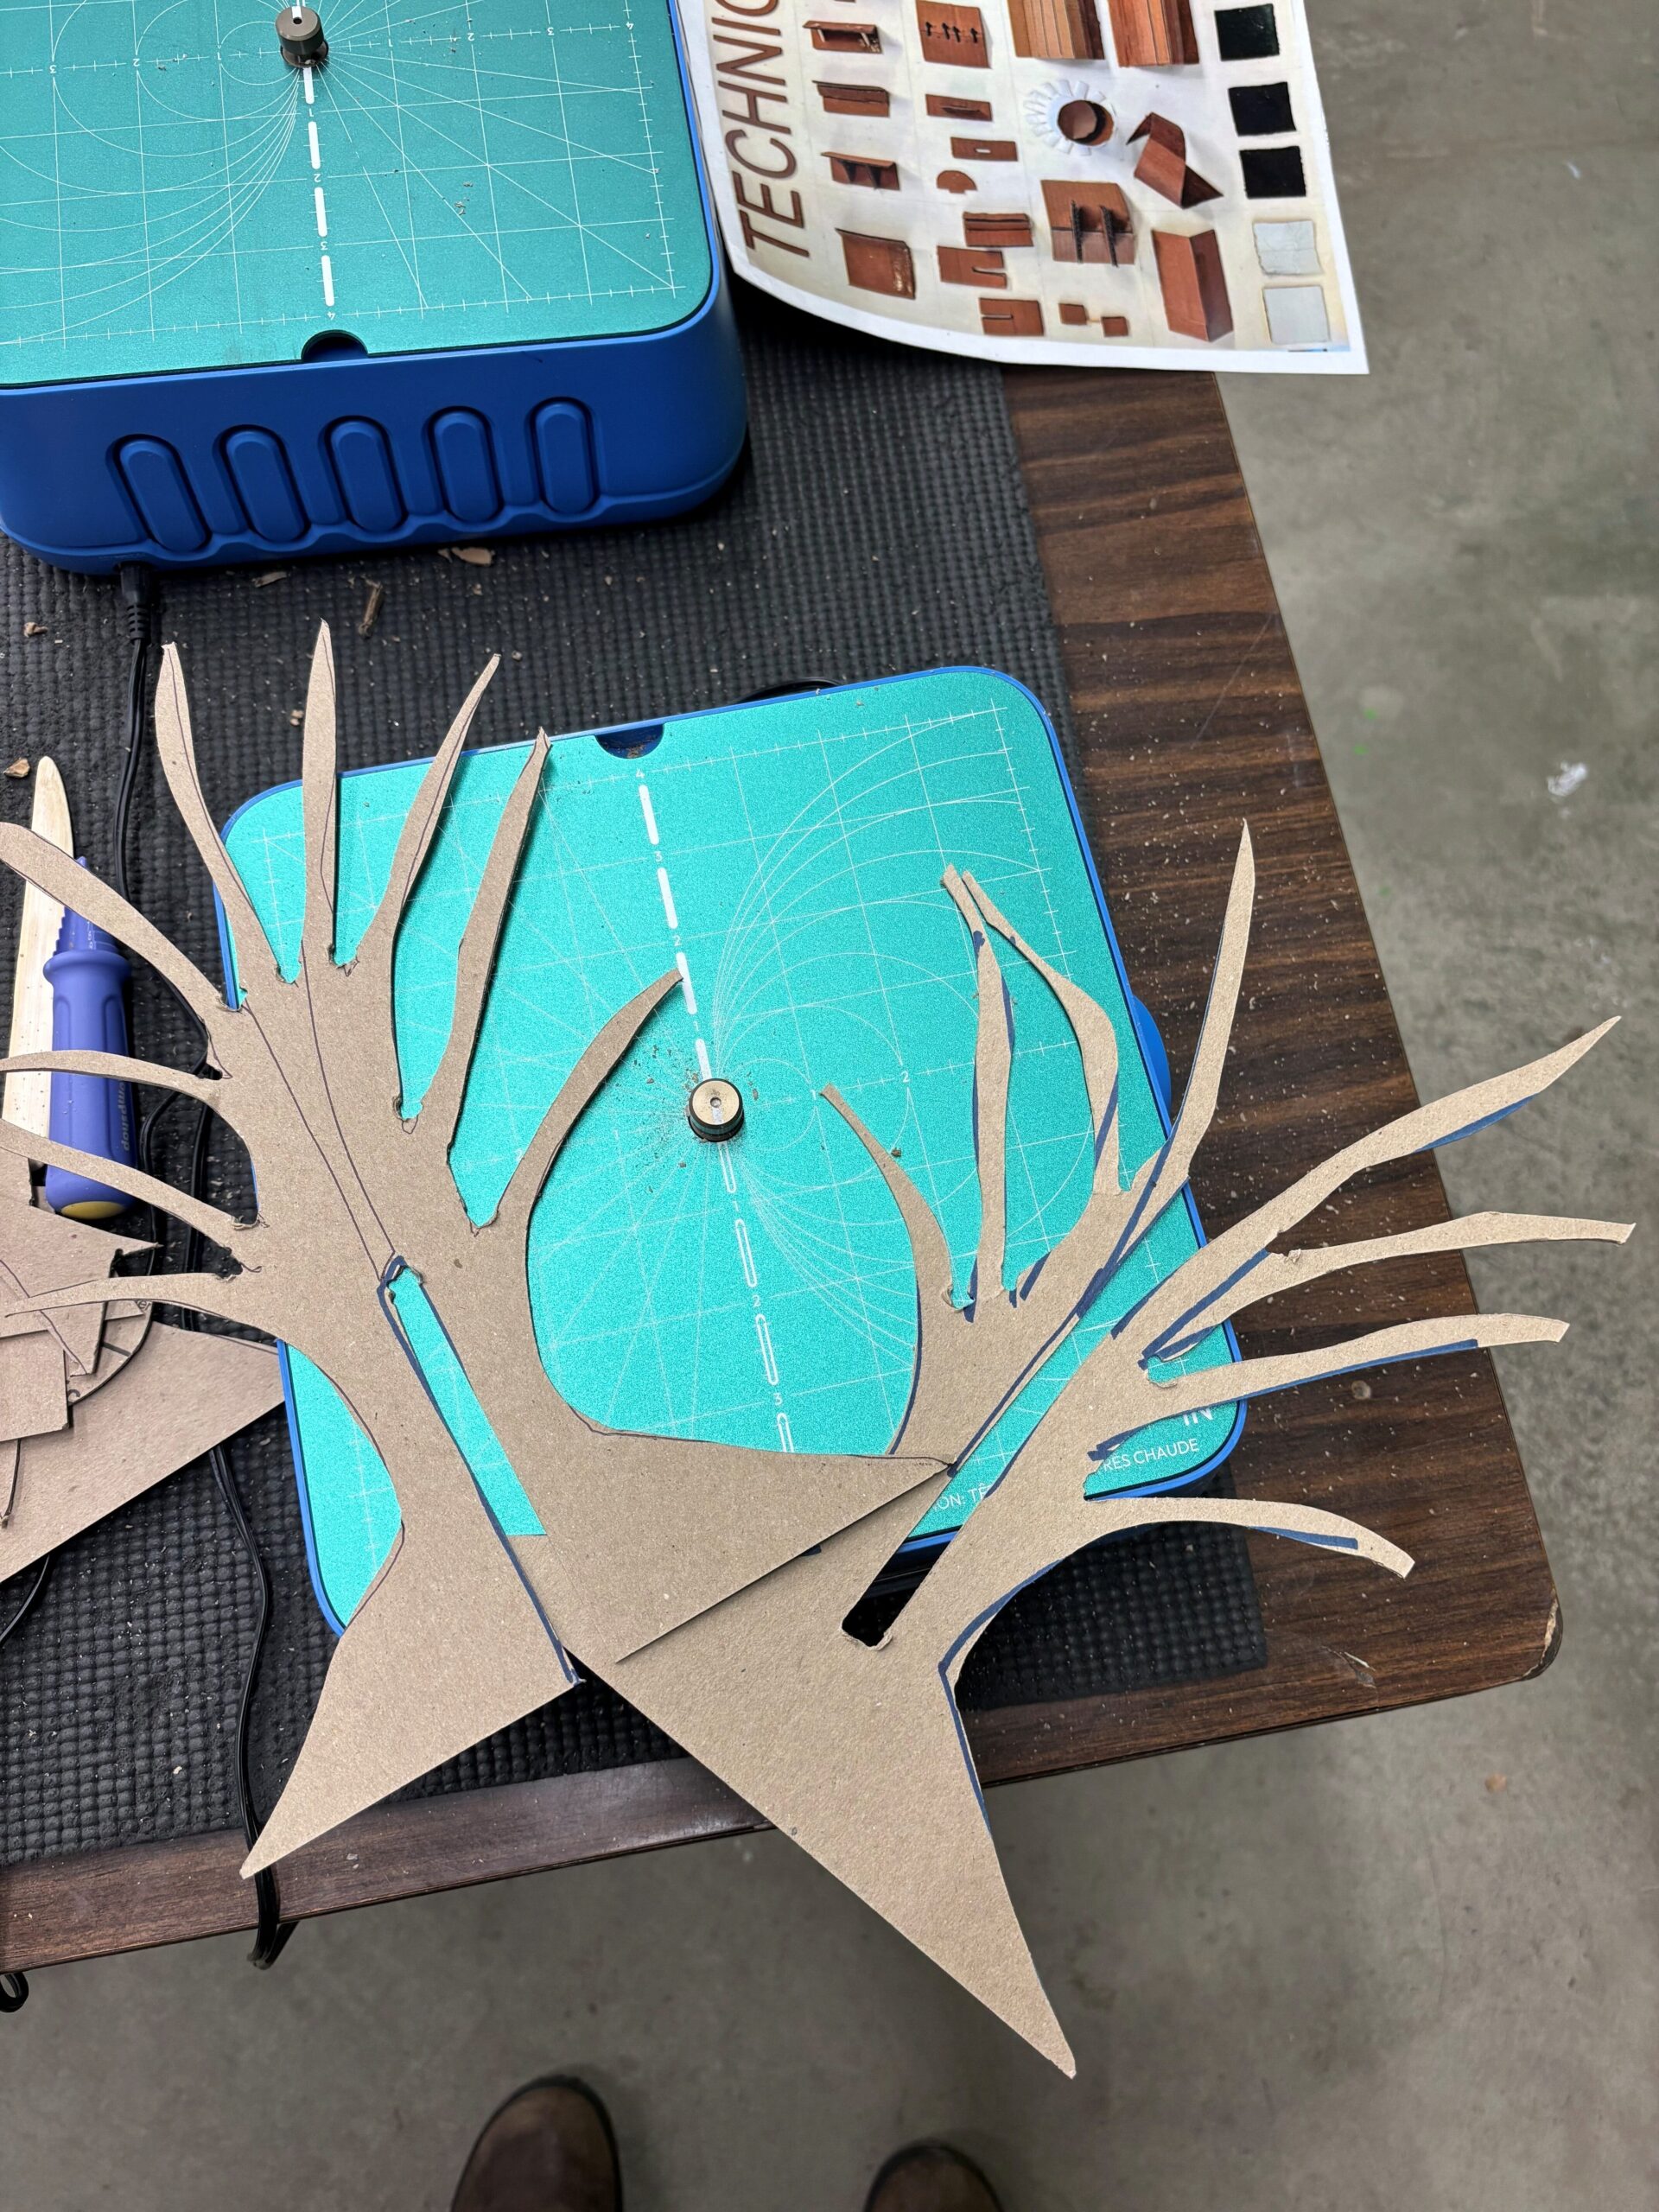
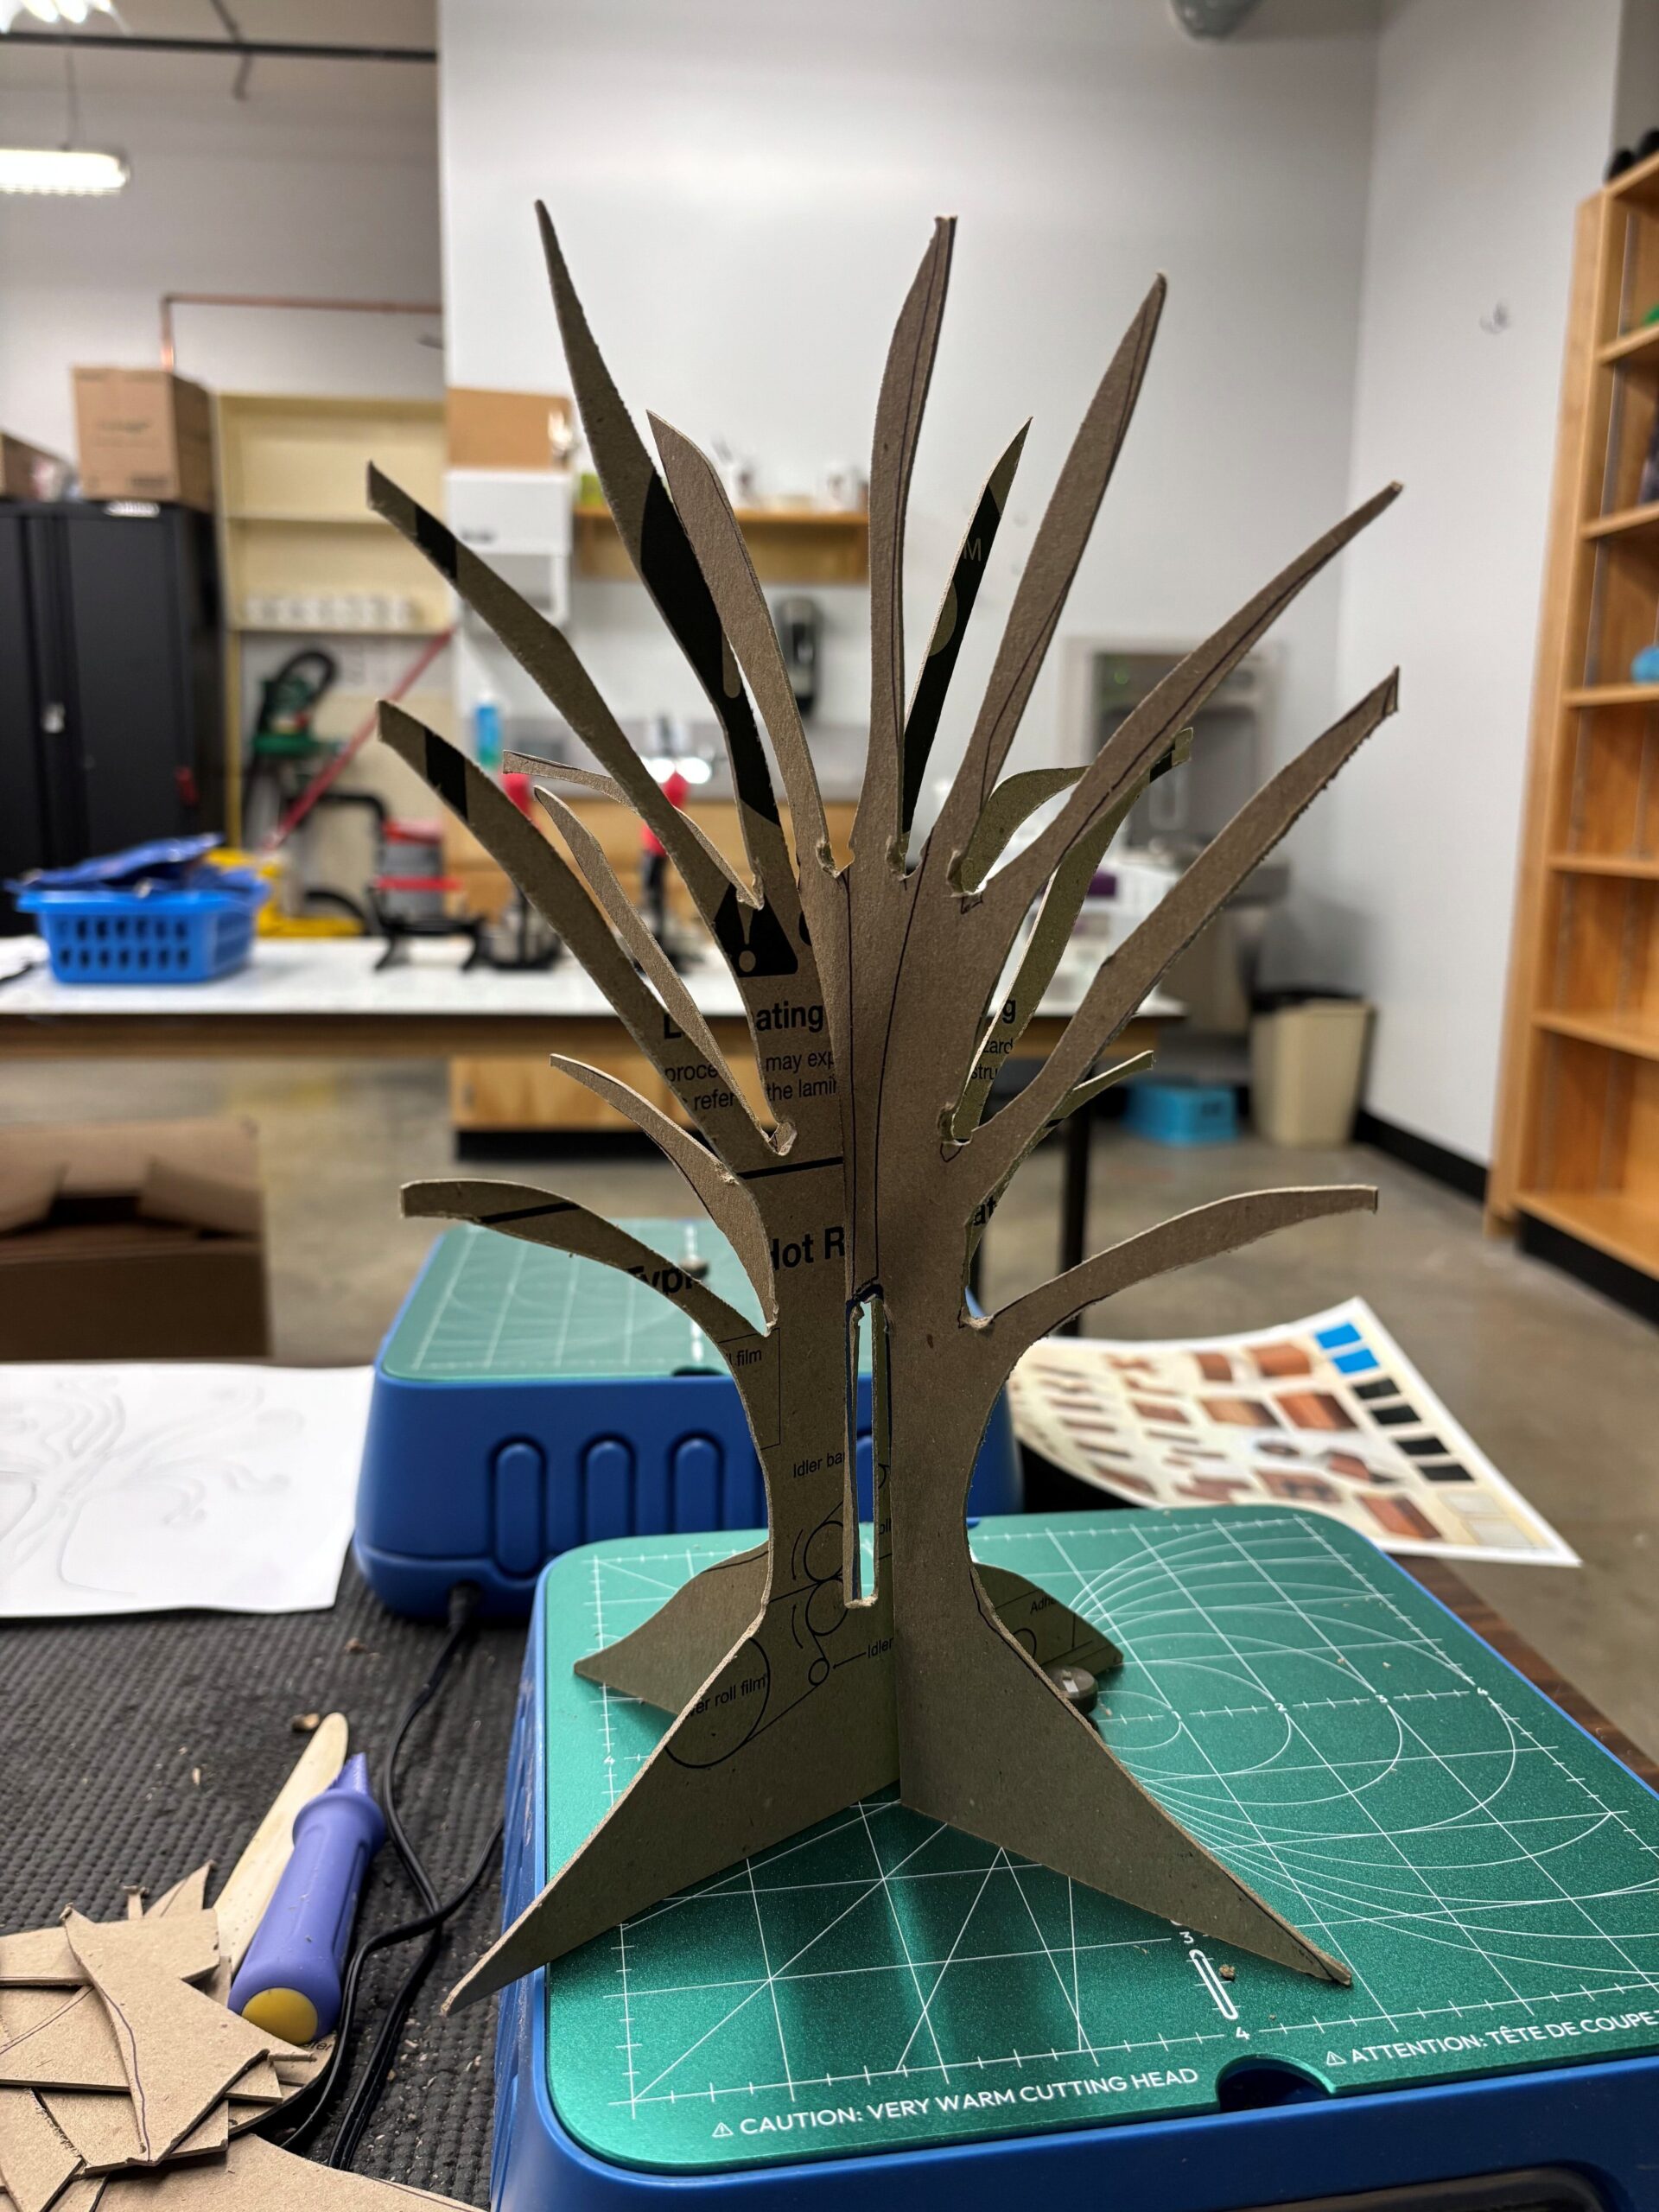
The chomp saw (as seen here) is an excellent entry point for students of all abilities and ages to bring their ideas from conception to reality. It is completely safe and allows for several prototypes to be made with minimal frustration.
This is a photo of my 3-D prototype tree. This is not its final design, but the height and width are what I want, and the stand is how I intended it to be. I made the cuts in the centre much too wide, so I will need to alter that before I use the laser cutter.
Step 4: Detailing the Tree
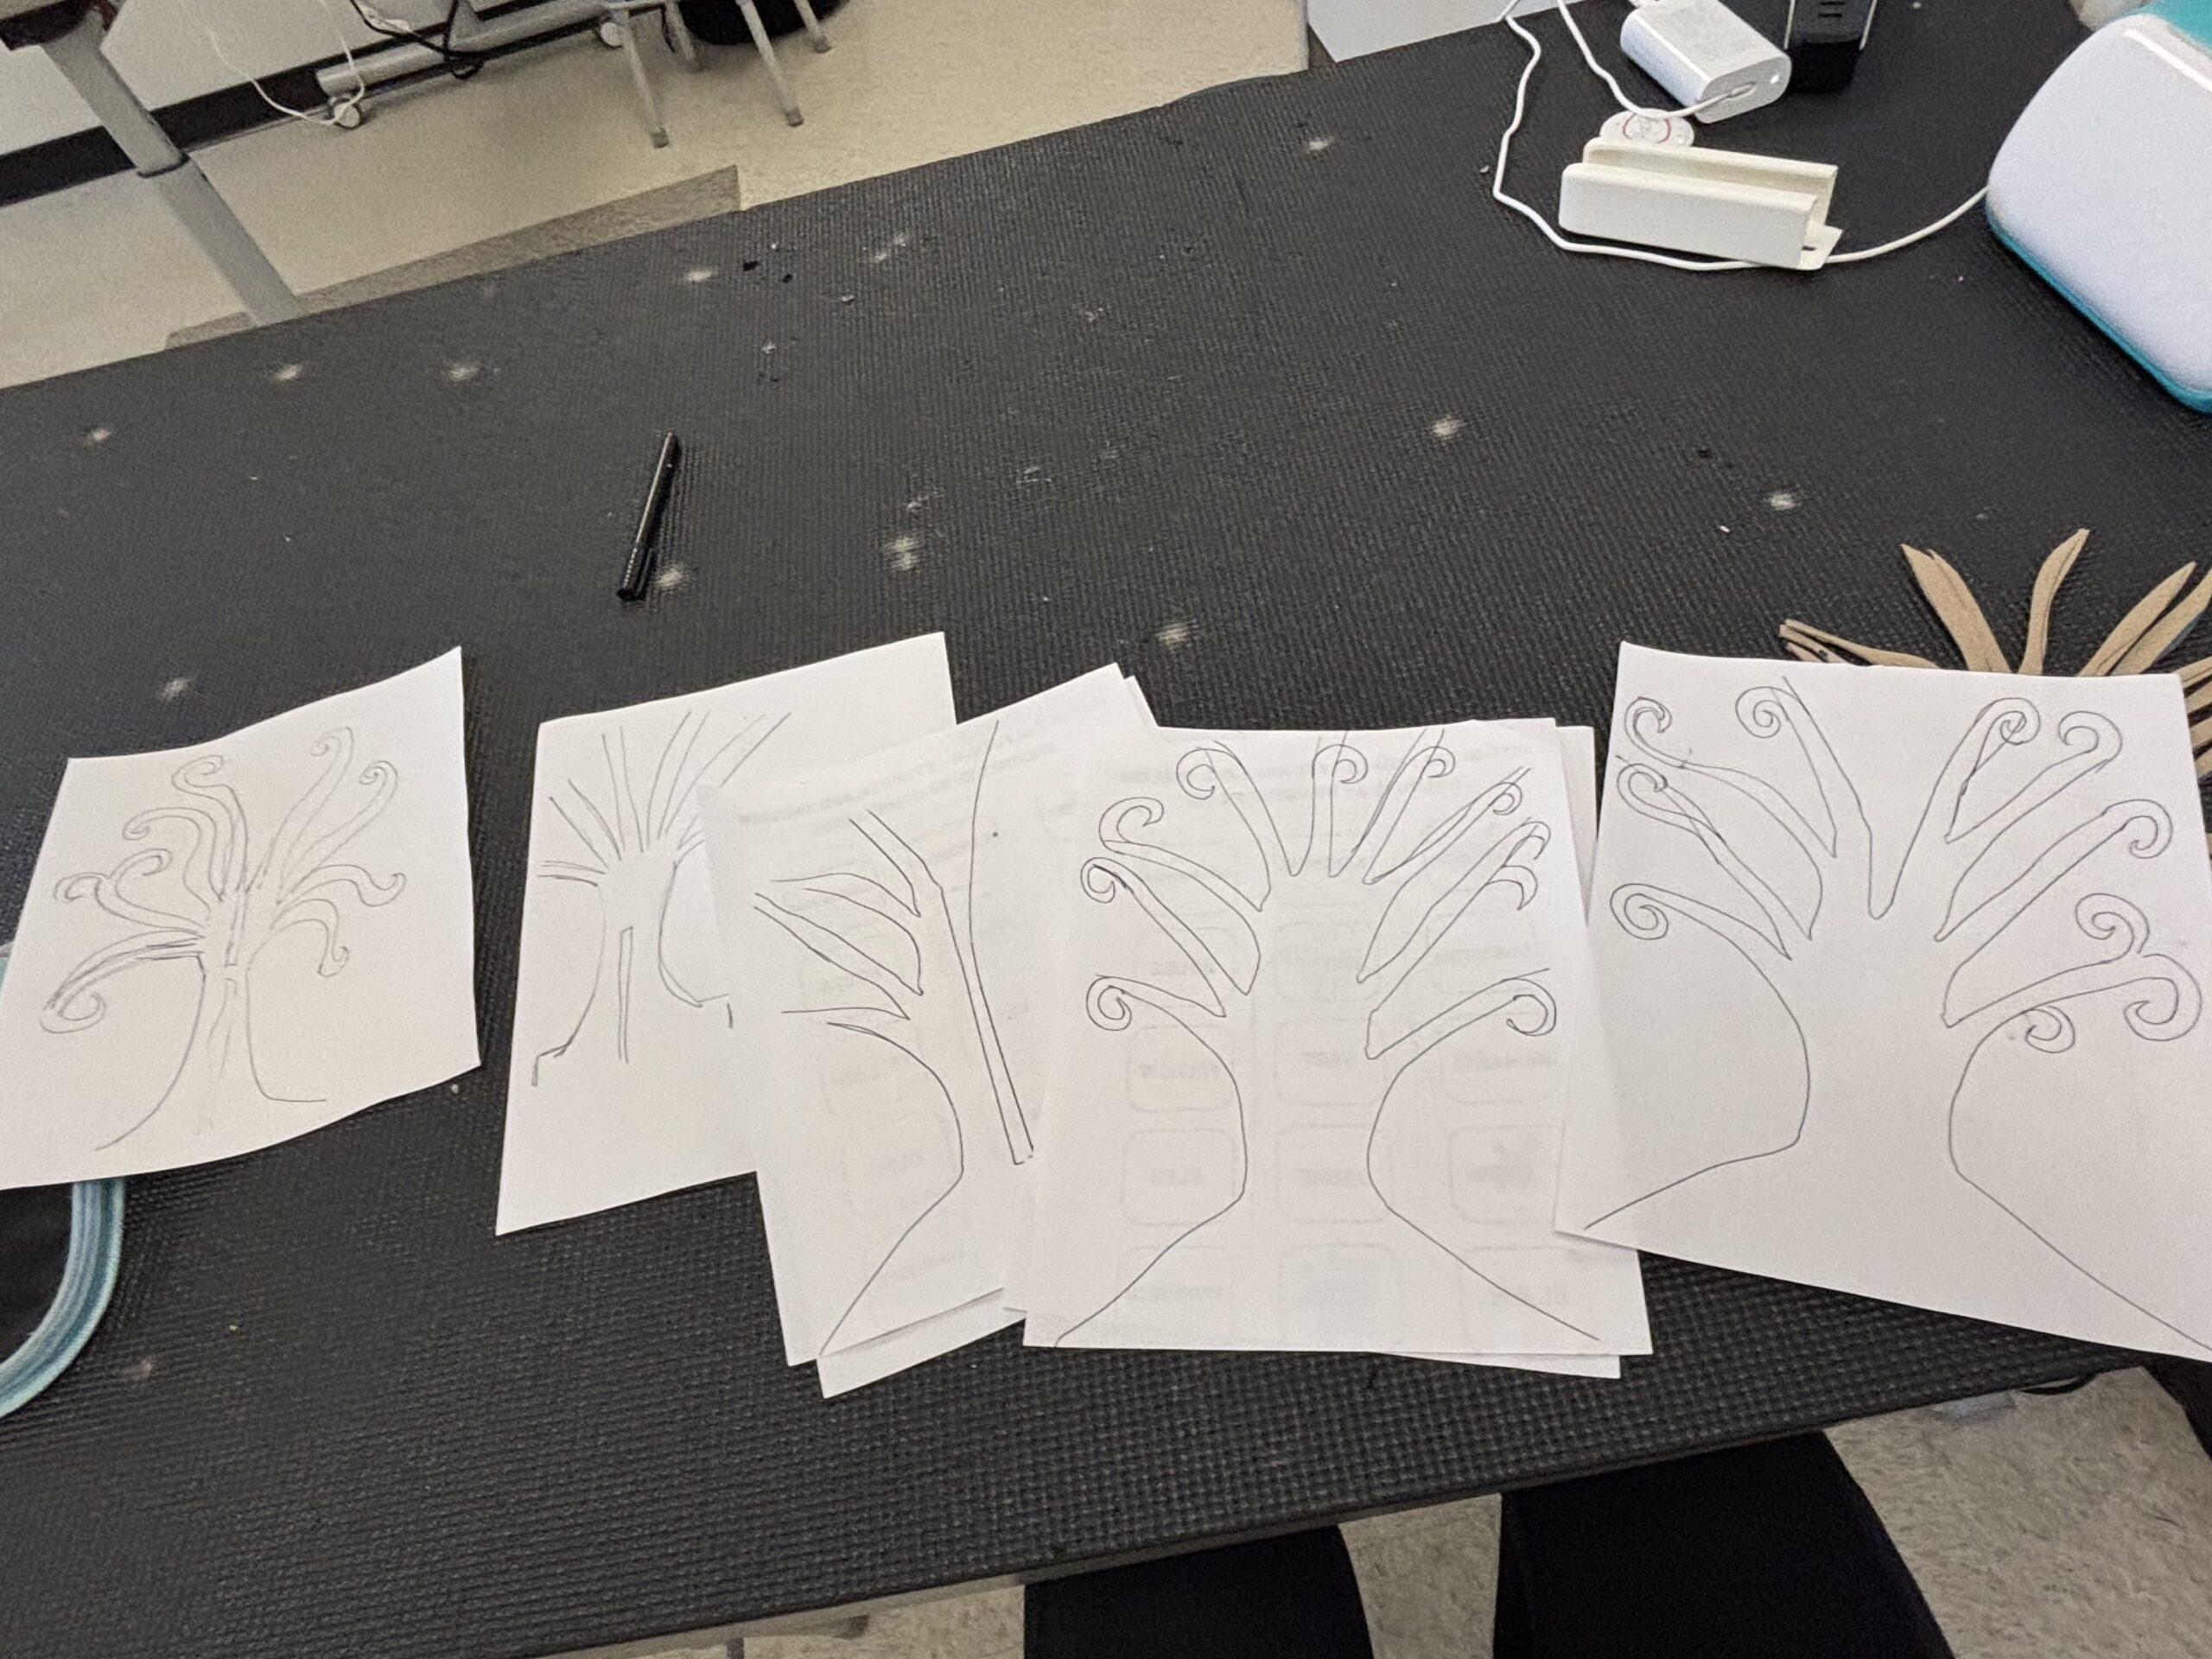
Now that the prototype is finished, the next step is to design the tree exactly how I want the laser cutter to cut it out. As shown in this photo, it took many iterations for me to finally be happy with how the tree looked.
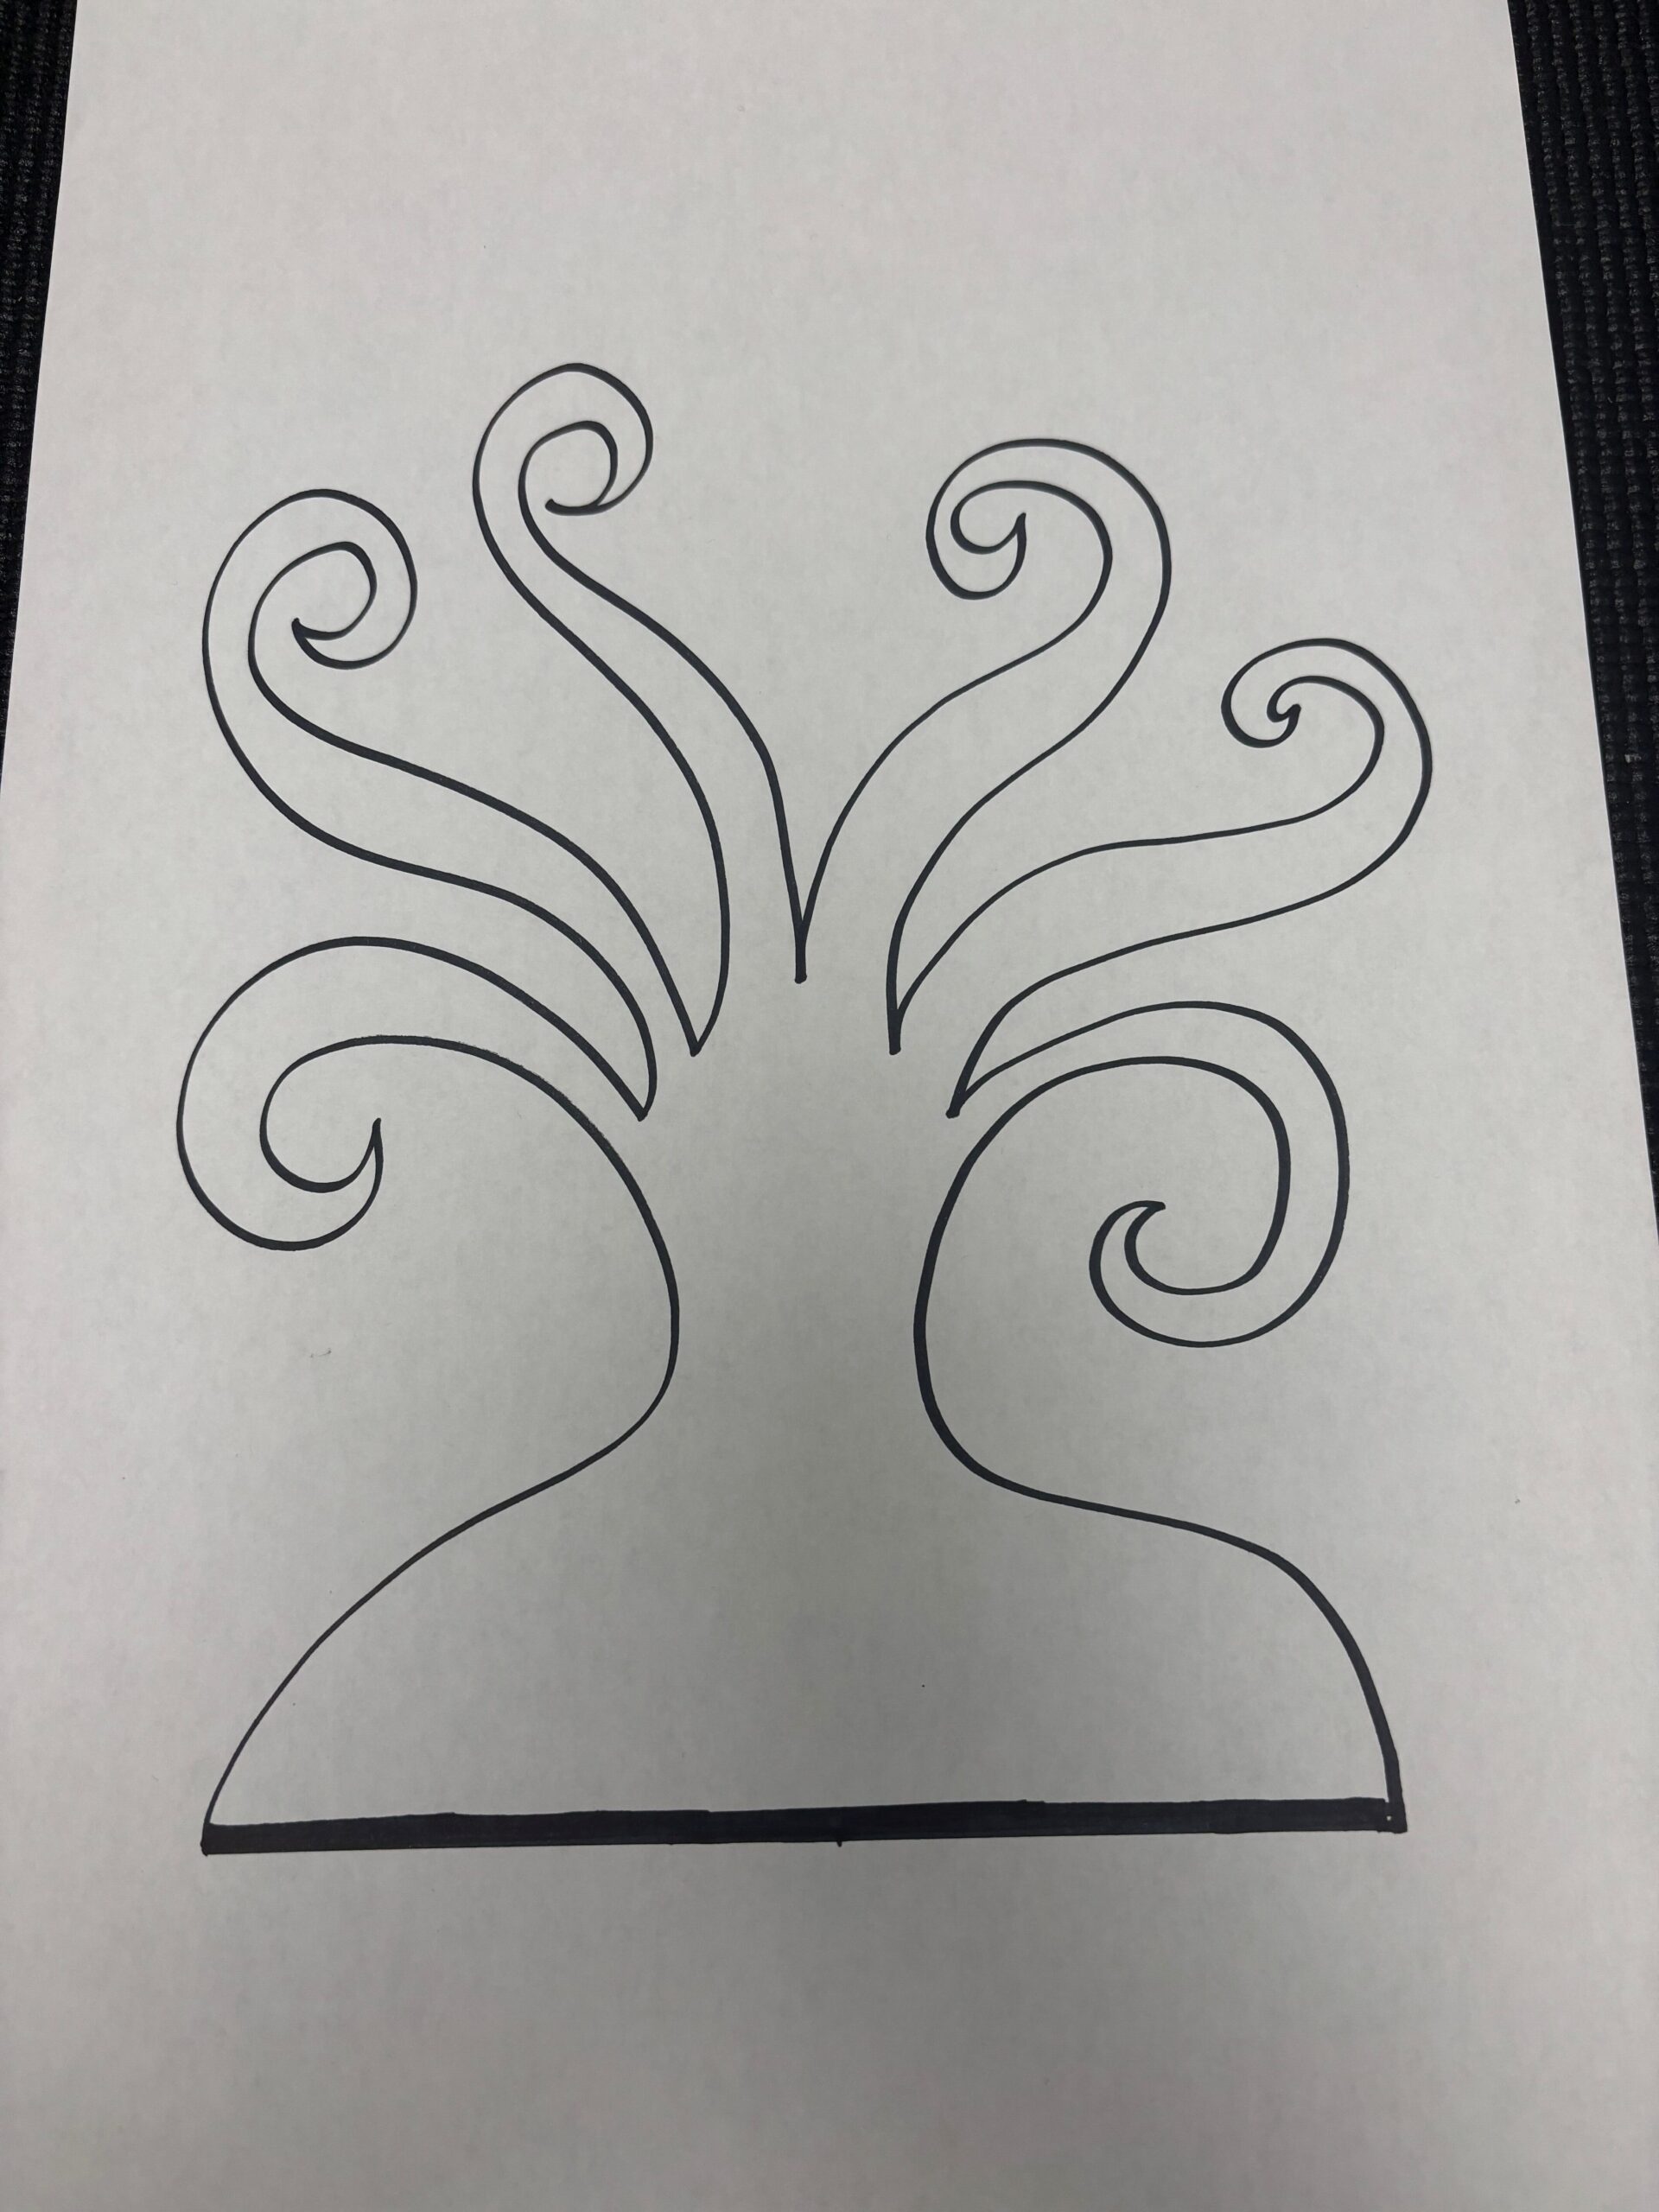
This is the final design of the tree. I wanted it to have curled branches so that it adds a whimsical element, while also functioning as a place to hang the circles the students will cut out. I will cut two of these with an opposite slot for them to interlock.
Step 5: Using X-Tool
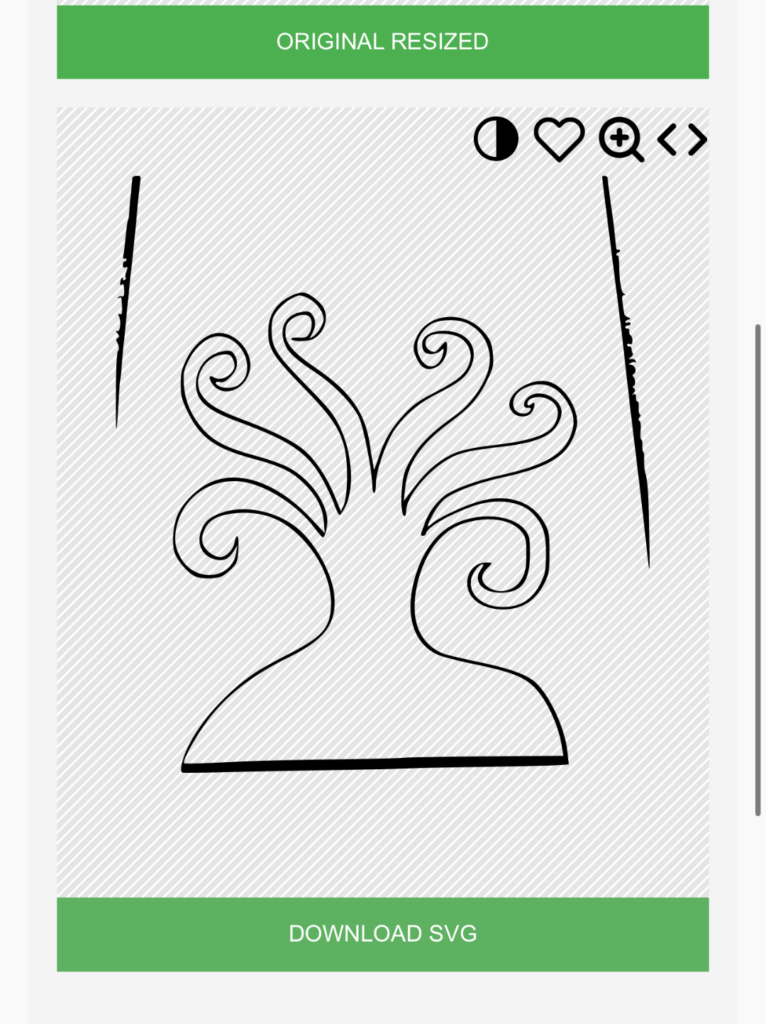
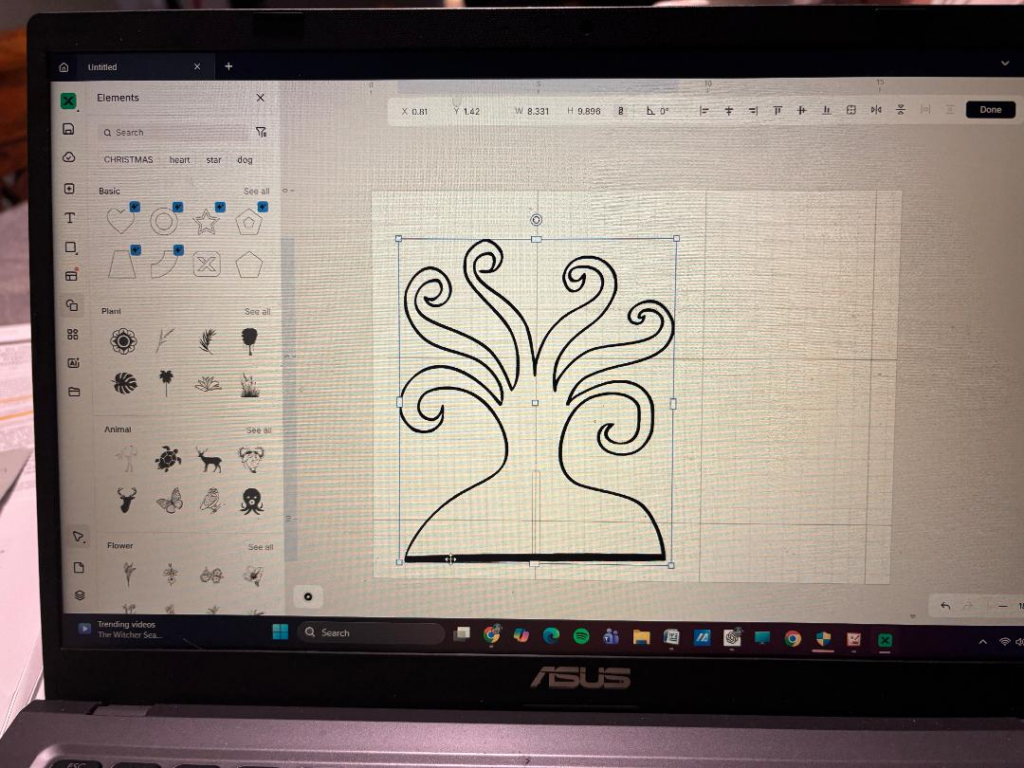
The next step was to take a picture of the drawing with the camera on my phone and convert it to an SVG image using a free SVG converter. I also downloaded the x-tool studio on my laptop, which is a companion app to the laser cutter that allows freedom to alter your design before it gets sent to the laser cutter. In x-tool studio, I adjusted the height and width (I ended up wanting it to be 12 inches high) and I added a rectangle in the centre of each tree, one at the top and one at the bottom so they could interlock. A photo of the SVG is pictured below.
Many of these design skills have pulled me out of my comfort zone. I have never converted a JPEG to an SVG, nor have I ever used the xtool studio. Learning the software has been frustrating and has been a steep learning curve.
This is a photo of the SVG in the xtool studio. It has a ruler at the top to show the dimensions, and other editing tools to allow iterations.
Step 6: Using the Laser Cutter
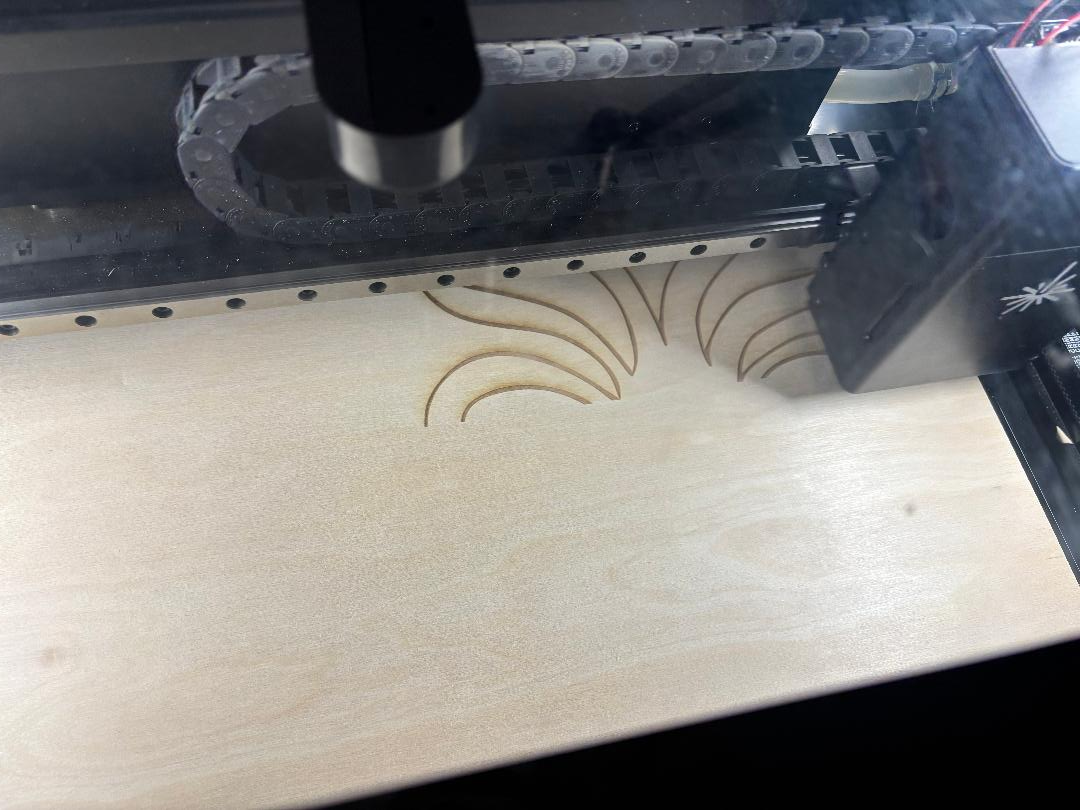
Now that the design is finished the next step is to cut out the design with 3mm wood. I attached my laptop to the USB cable of the laserbox and aligned my design on the wood. The wood was a little too long for the dimensions of the machine, which made it not cut through some parts completely. This was an easy problem to fix though; I just used an exacto knife and put pressure on the wood to detach it from the other scrap piece of wood. Two trees needed to be cut out so that they could interlock. One cut being in the center on top, the other on the bottom. The cut was 2.75 mm so that the wood would tightly fit together as shown in the photo below.
Note: the engraving of the trees took much longer than expected (45mins-1 hour for each tree). The engraving was set at 300mm at 45% which added a beautiful detail to the final product.
Step 7: Cutting out the Circles

This is the collaborative part that the students will design. I will give each student a 2 inch circle with a string to hang on a branch of the tree. They will write their name and a strength they feel they have to contribute to the class. I will explain that the tree is a symbol of our classroom community and how everyone in our class is welcome, included, respected and safe. This tree will remind us that our differences and strengths bring colour, vibrance, and joy to our classroom! We will also have a lesson about types of character qualities to give them ideas of what types of strengths to look for in themselves.
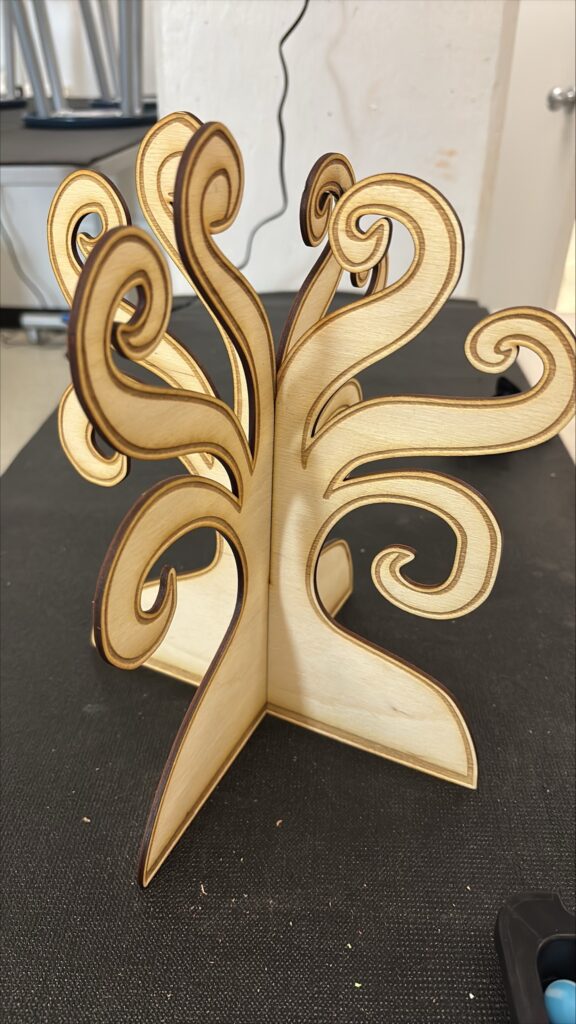
Step 8: Final Product
Voila! All done! The interlocking cuts fit perfectly and it turned out exactly how I had envisioned.
Step 9: Reflection
Cohen et al reminds us that maker spaces need freedom and minimal restrictions (Cohen et al, 131). They also reiterate that in order for constructionism to improve student learning, there needs to be some sort of framework, which provides a foundation for maker activities. Without the parameters and sharing element within a framework, these designs would be nothing more than arts and crafts activities, which indeed have value in their own space, but are separate from the goals of makerspaces (Cohen et al, 131-132).
I really appreciated the minimal framework given for this maker challenge. The only stipulations we had were to make an artifact that would incorporate the EDIDA model. I was able to personalize my work as I had free access to all the tools in the design lab, as well as support from my instructor. This fostered my autonomy, creativity, and self efficacy.
At first, I felt really frustrated because I couldn’t think of anything that would fulfill the requirements. I was at a loss as to what I could possible create. I was hoping for some sort of examplar to kickstart some ideas, but our instructor wisely withheld such examplars so that we would use our own ideas and not depend on existing projects.
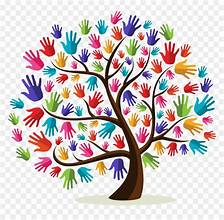
The shift in perspective happened when I started thinking of what has made me feel connected, included and valued for my uniqueness in different environments. I immediately thought of my family tree and how it has shaped my identity. I started remembering different images I had seen on the internet that had hands as leaves on branches and my imagination took off from there. I really liked the idea of this artifact being a collaboration with the students in my class. I love that it can be a tangible symbol of inclusion and acceptance of diversity.
Kye explains that makerspaces aim to promote creativity and access, but often overlook cultural and racial inclusivity. To truly welcome all learners, makerspaces need to intentionally apply culturally responsive practices (CRP) that reflect diverse identities. Building inclusivity into makerspaces as well as classrooms will ensure that everyone can see themselves as creators and contributors (Kye, 2020).
Melo goes even further to state that “the desire for inclusive makerspaces does not drive material changes in these environments; to cultivate more diverse and
inclusive makerspaces, equitable and affective interventions
need to occur on a systemic level” (Melo, 2020). The desire for change is a start, but actually doing something about that desire is what will bring about change. This is something to consider when setting up a makerspace. Are all tools inviting and welcoming to all genders? Do we have biases about who should be using certain tools in a makerspace? These are topics to be mindful of as we intentionally set up a design space for students of different genders, races, and backgrounds.
Through this design process of ideation, iteration, designing, and making a prototype prior to using the laser cutter, my desire for implementing makerspaces and integrating design challenges into my classroom has increased dramatically. My confidence has grown as I have learned new skills, used my imagination, and created an artifact that can actually be displayed in my classroom and can be used to remind students that each individual in our class is valued and accepted.
References
Cohen, J., Jonathan Cohen, W Monty Jones, Shaunna Smith, & Brendan Calandra. (7). Makification: Towards a Framework for Leveraging the Maker Movement in Formal Education. Journal of Educational Multimedia and Hypermedia, 26(3), 217.
Kye, H. (2020). Who Is Welcome Here? A Culturally Responsive Content Analysis of Makerspace Websites. Journal of Pre-College Engineering Education Research (J-PEER), 10(2), Article 1.
https://doi.org/10.7771/2157-9288.1190
Melo, M. (2020). How do makerspaces communicate who belongs? Examining gender inclusion through the analysis of user journey maps in a makerspace. Journal of Learning Spaces, 9(1), 59-68. https://libjournal.uncg.edu/jls/issue/view/172


